
How are liquid volumes measured in the laboratory?
The most frequent case of measuring volumes in the laboratory arises when a certain amount of reaction solvent is needed, to prepare eluents in chromatography or to prepare solutions of a given concentration. There are different types of materials used for this purpose, which vary according to the quantities handled and the precision required.
The equipment used to measure liquid volumes is called volumetric equipment. Among the most commonly used are pipettes.
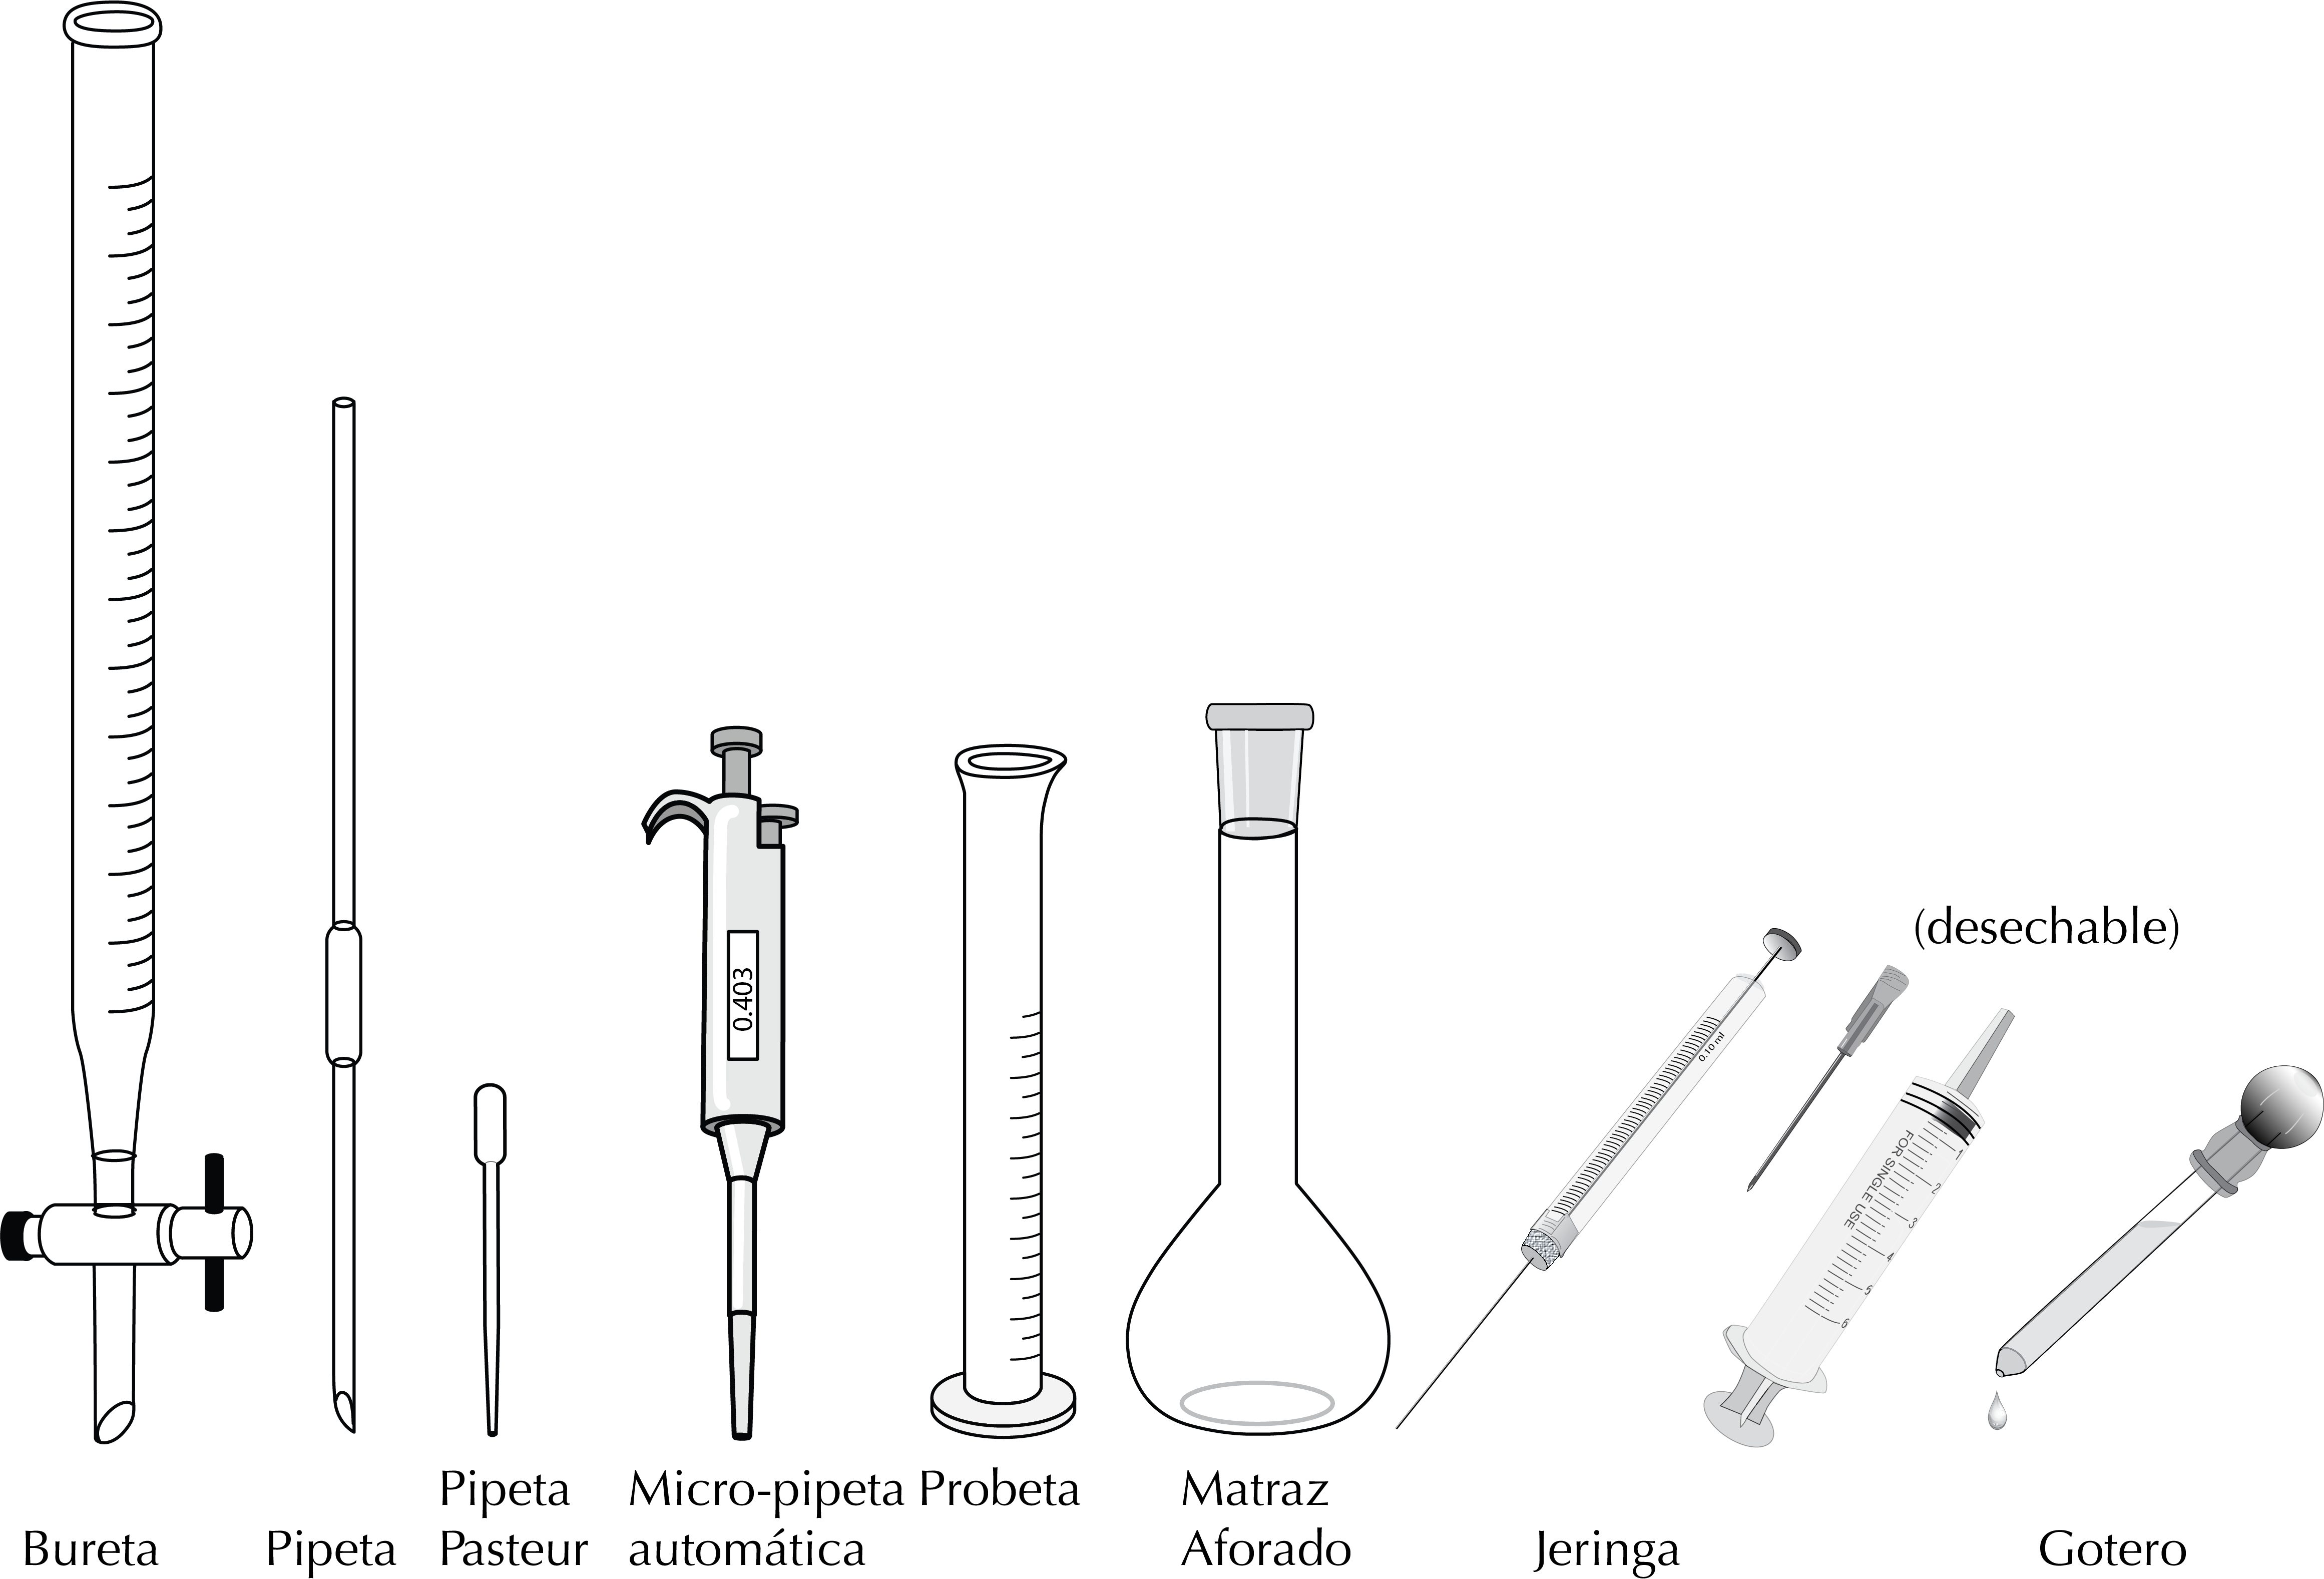
Pipette
It is a clear glass tube with a tapered end that allows fairly accurate volume measurements. To fill, the pipette is aspirated (using a pipettor) from the top. It should never be pipetted by mouth, given the volatility and toxicity of many of the compounds used in a laboratory.
Two types of pipettes are used in the practical laboratory: mohr (backward or drain-out pipettes) and serological (forward or blow-out pipettes).
The most common pipettes are the mohr pipettes. These have a series of marks etched into the glass indicating the volume. The liquid is aspirated and the liquid level is made up to zero once, then dropped to the required volume division.
The serological pipettes (blow-out pipettes) are of fixed volume and have a double calibration mark. First, the liquid is flushed to the upper mark and then carefully dropped to the lower flush. Although they have the disadvantage of measuring a fixed volume of liquid, they are much more accurate than single flush pipettes, since the measured volume does not change if the conical pipette tip is broken or deformed. The error limits associated with pipettes according to their volume are ±0.006, ±0.01, ±0.02, ±0.03, ±0.05, ±0.08 and ±0.10, for pipettes of 2, 5, 10, 30, 50, 100 and 200 ml, respectively.
Propipetter
To fill the pipette to the desired level by suction, devices called pipettors are used. The most common pipettors are:
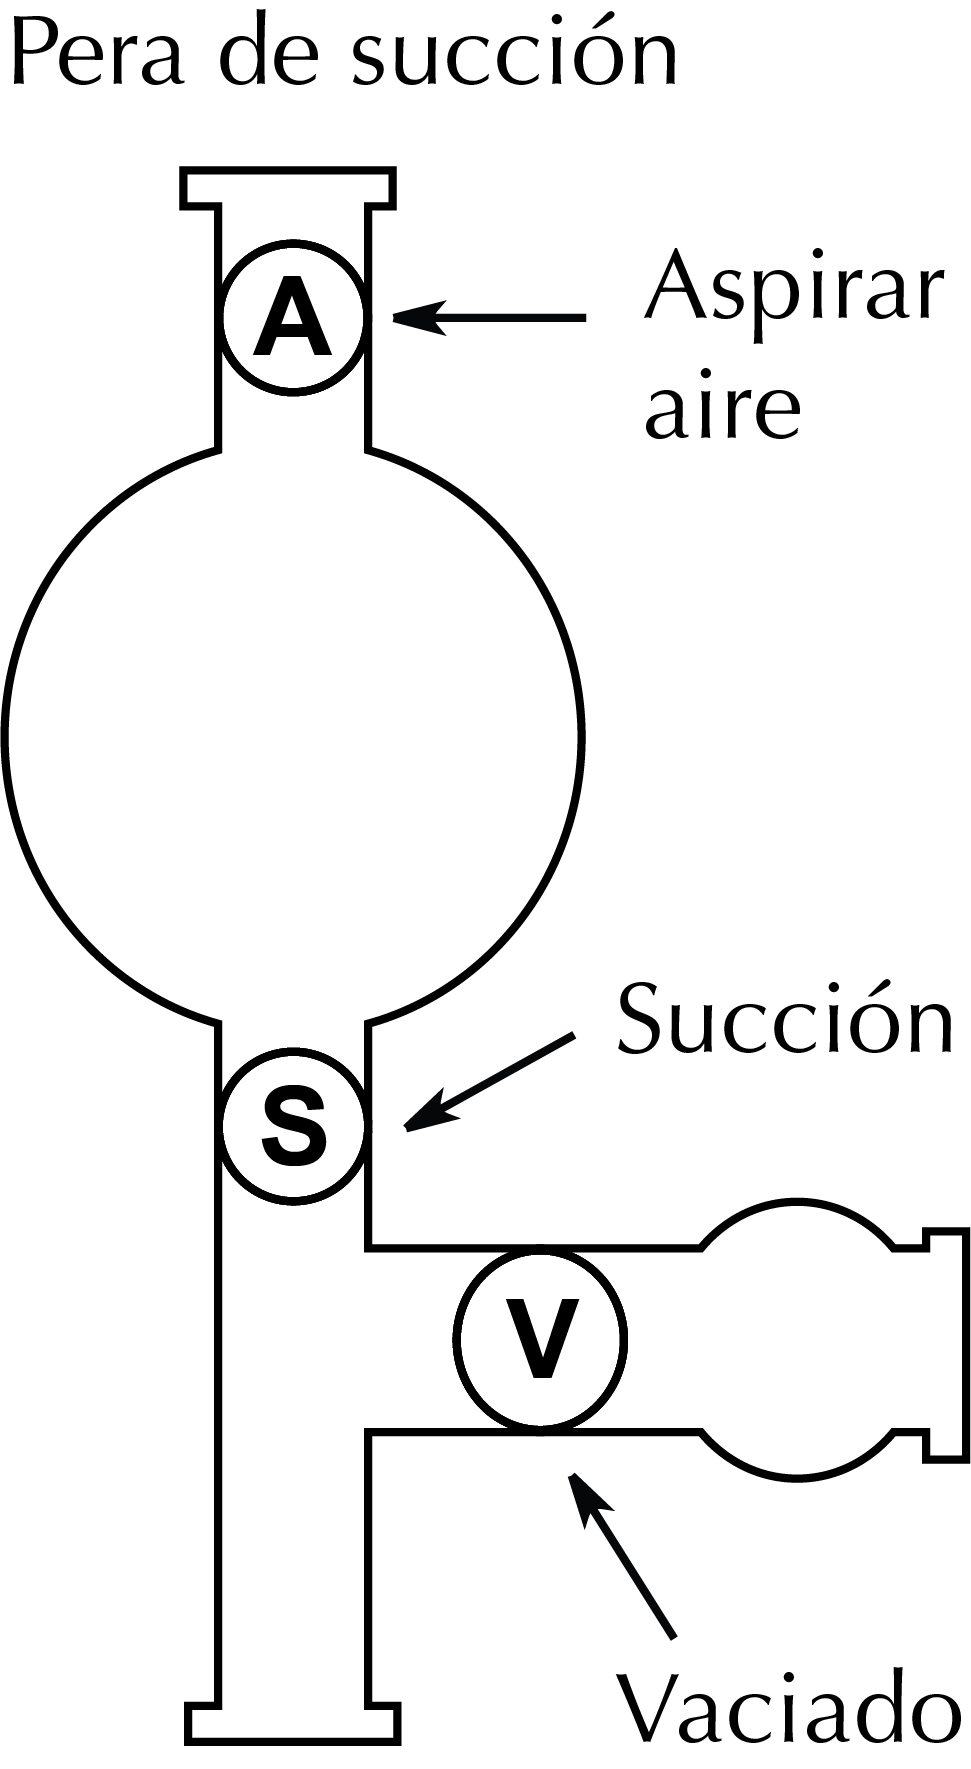 Bulb pipette: It is a hollow rubber sphere with a three-valve system ‘A‘, ‘S‘, ‘V‘(see Figure). First, the valve ‘A‘ and the rubber ball are squeezed simultaneously, thereby generating a vacuum. Subsequently, the valve ‘S‘ is pressed, which sucks the liquid up to the appropriate level and finally the valve ‘V‘ is pressed, which causes the liquid to flow out.
Propipetter: It is a hollow plastic tube that 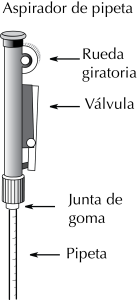 it has a plunger that moves by means of a toothed wheel. At the lower tip there is a rubber part with which it fits into the mouth of the pipette. When the toothed wheel rotates, it sucks in the liquid. When the liquid reaches the desired height in the pipette, the contents can be released into another container by pressing the side valve. In these pipettor models, it is important that the rubber parts are not damaged, neither the rubber gasket of the valve nor the rubber part that fits into the pipette, otherwise they become unusable because they cannot be emptied.
Pipetting procedure
The correct use of a pipette involves the following procedure:
- Insert the pipette (conical tip downwards) into the container from which you wish to extract a given volume of sample.
- Place the propipetter at the other end of the pipette and the liquid is brought up above the upper gauging.
- Quickly, the propipette is removed by placing the index finger on the upper part of the pipette to prevent it from descending and proceed to the graduation in the upper gauging.2
- Slowly and gently decrease the pressure exerted by the finger until the liquid begins to descend. Press again when the liquid meniscus is at zero. If the liquid descended too much, start again.
- Transfer the pipette to the target container.
- Decrease the finger pressure again until the required number of milliliters is reached.
- To empty a graduated pipette completely, remove your finger and let the liquid fall by gravity; but do not force the last drops to fall, they should remain in the conical tip of the pipette.
- In graduated pipettes, different volumes of liquid can be measured, since they have a graduated scale.
- The volumetric pipette has a single calibration mark, so it can only measure a certain volume.
Video on how to measure a volume of a liquid using a measuring cylinder
Automatic micropipette
It is a device that allows measuring and transferring small volumes, usually between 1 and 1000 μl. Micropipettes are classified into three groups: P1000 useful for volumes from 200 to 1000 μl, P200 useful for volumes from 20 to 200 μl, and P20 useful for volumes from 0.5 to 20 μl.
The liquid is suctioned and expelled in hollow plastic parts (tips) that are disposable, which are fitted into a tube called the stem. The stem is attached to the handle or body of the pipette which contains a piston inside a cylinder whose movement produces suction. The body serves as a handle and at the top it has a button, which is attached to the plunger that controls the suction and expulsion of the liquid, exerting pressure with the thumb. This button has two stops. The body has a button to disconnect the tip from the stem (ejector). There are automatic pipettes with fixed and variable volume. Variable volume pipettes have a volume adjustment mechanism on the body and a display that shows the selected volume in figures.
Pipetting procedure
- Fit the disposable tip to the shaft by a slight twist without exerting pressure between the pipette and the tip.
- Adjust the volume.
- Press the button with the thumb until the first stop and, without releasing, dip the tip into the liquid from 2 to 5 mm, keeping the pipette vertical.
- Lift your thumb and let the button return to its initial position.
- Rest the pipette on the inner wall of the vessel at an angle between 10 and 45◦ with the vessel, slowly press the push button to the first stop, and after one second, without releasing the push button, finish emptying the pipette by pressing to the second stop.
- Remove the pipette from the container.
- Remove the tip by pressing the ejector.
Volumetric flask
It is a type of flask with a high neck, narrow and flat bottom that is used to accurately measure a given volume of liquid. They have a mark on the neck which indicates how far the liquid level must reach to reach the volume corresponding to the capacity of the flask. The liquid forms a curvature in the neck called meniscus (see Figure). When the tangent of the meniscus that produces the liquid with the wall of the container reaches the level of the signal, its volume is the one indicated by the manufacturer of the flask. Its main use is to prepare mixtures or solutions of known concentration.
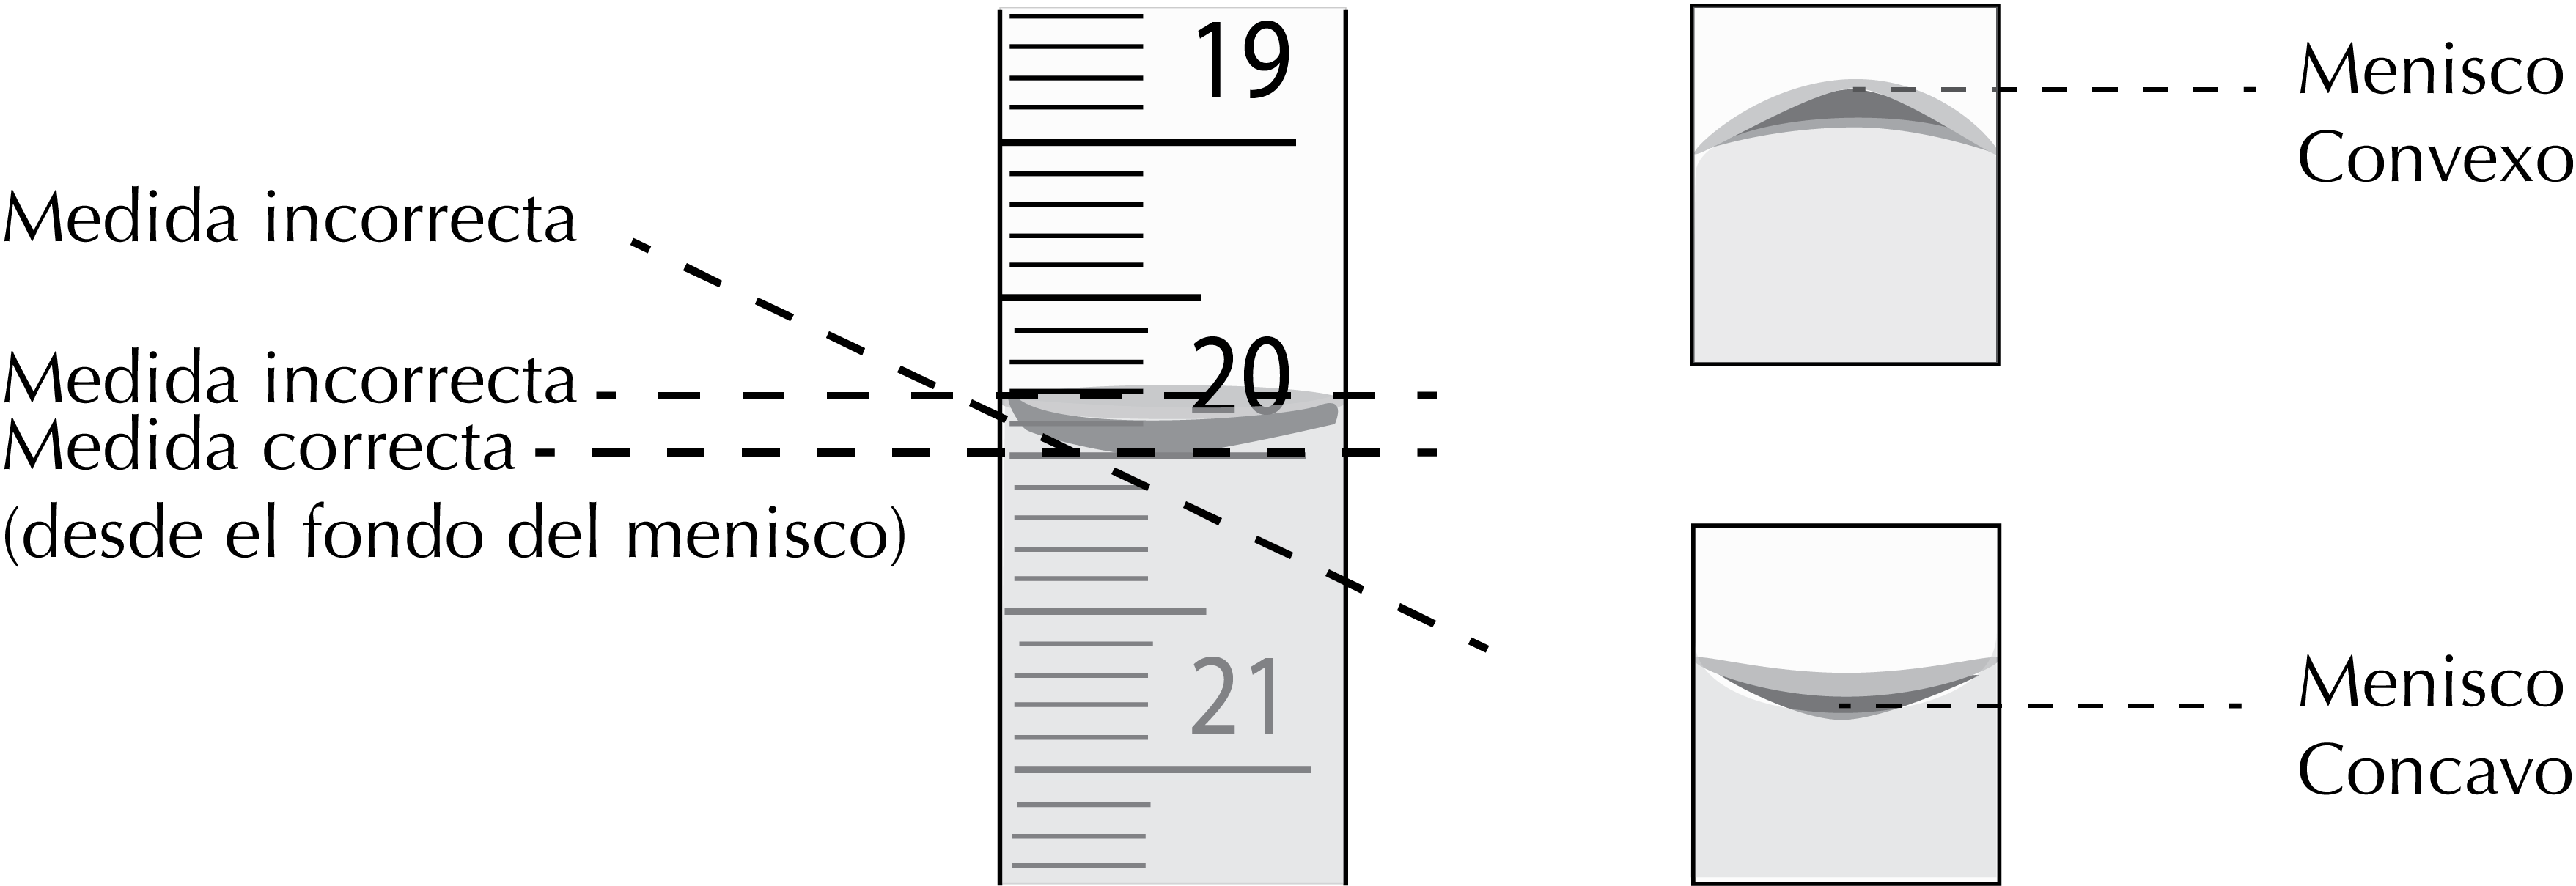
To prepare a solution in a volumetric flask, proceed as follows: Weigh or measure the volume corresponding to the amount of solute (depending if this one is solid or liquid), and it is transferred to a beaker, there it is diluted little by little with the solvent. Then, it is poured into the volumetric flask until it is practically full, then the solvent is added little by little with a Pasteur pipette until the lower part of the meniscus is flush with the line of the volumetric flask. The flask is then capped and shaken to mix the entire solution thoroughly.
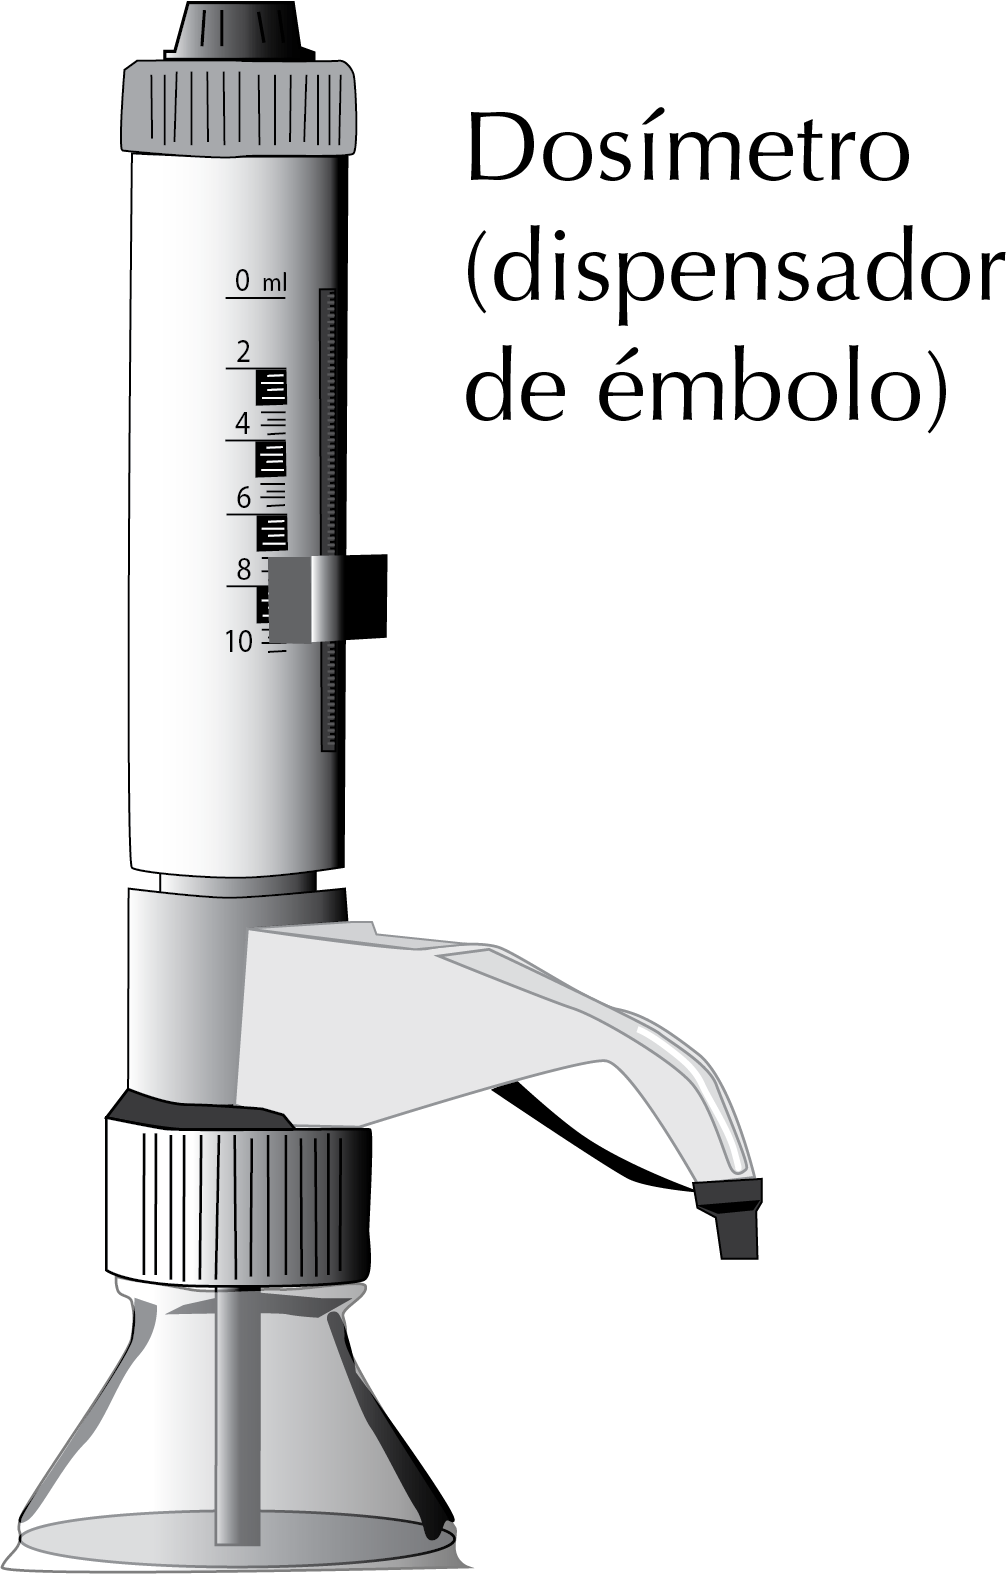
Automatic dispenser
It is designed to fit reagent and solvent bottles, so they are often sold in different sizes and with different dispensing capacities (> 0.1 ml). The device for exerting pressure resides in a plunger that is operated by raising and lowering it (similar to a syringe). The plunger must be moved smoothly so that no air enters the plunger.
In addition, we will have to make sure that before dispensing liquids it is purged (that the plunger has no air inside). Otherwise, the amount of liquid dispensed would not be accurate. To purge the device, the plunger must be refilled several times by dispensing the liquid into another container (which is discarded), until the pump is completely filled with liquid. The sample is dispensed into the final vessel (round bottom flask, Erlenmeyer flask, beaker, etc.) to be used (if necessary it should be tared). Finally, we will make sure that the last drop in the dispenser is transferred to the final vessel. This device is especially indicated to handle strong acids such as H2SO2 or HNO3and it is not advisable to use it with organic solvents as they deteriorate some of its components.
Graduated cylinder
It is a transparent graduated cylinder, made of glass or solvent resistant plastics such as PP or PMP, which allow volumes to be measured with relative accuracy. The lower part is closed and has a base for support. The upper part is open and usually has a spout for easy pouring of the liquid. They can have a capacity ranging from 5 to 2000 ml. When greater precision is required, other volumetric instruments such as volumetric flasks or pipettes are used.
Syringe
It consists of a plunger inserted into a graduated tube with a small opening at one end through which the contents of the tube are expelled and to which a needle can be attached. They are used to introduce small quantities of gases or liquids into inaccessible areas, or to take samples of the components in these areas. To fill it, the plunger is pulled, then it is placed with the needle upwards and the plunger is pressed to expel any remaining air bubbles, and then the liquid is expelled by pressing the plunger.
There are disposable syringes, usually made of polypropylene. With this type of syringe, the volume measured is approximate. Borosilicate glass syringes are also available. The most common ones have a capacity between 1 and 100 ml. In this case the volume can be measured somewhat more accurately. Finally, within this section, we should mention the precision syringes that measure volumes starting from 5 μl.
Glass syringes should be washed immediately after use with an appropriate solvent that removes the remains of the liquid that has been used, followed by washing with deionized water and finally with acetone.
Burette
It is a graduated tube (with subdivisions, depending on the total volume down to tenths of a milliliter or less), with a uniform internal diameter and fitted with a stopcock at the bottom called a stopcock. They are used to measure variable quantities of liquids, mainly in volumetric analysis, or to dispense a reagent until the end point of the reaction is reached. The error tolerances in burettes are associated with the volume of the burette, for 10, 25 and 50 ml burettes their associated errors are ±0.02, ±0.03 and ±0.05, respectively.
The measurement of liquids in burettes is performed at the top of the burette, as they are designed to dispense liquids from the bottom. The amount of liquid dispensed is calculated by measuring the difference between the initial and final values. They usually allow a more precise measurement by observing the change in thickness (with or without liquid) of a vertical line that is usually engraved on the back.
The stopcocks are usually made of glass in Geissler burettes (they are attacked by bases). To avoid this drawback, Teflon can be used, which is inert and resistant. Another simpler type of stopcock usually used in Mohr burettes is the Bunsen stopcock, consisting of a glass bead inside a rubber tube, which lets the liquid pass through when the tube is pressed.
The volumes measured with burettes are accompanied by systematic errors, such as drops stuck to the bottom or small air bubbles behind the stopcock. Care should be taken to ensure that emptying is not too fast. To avoid errors by defect, if a drop is left hanging at the end point, it should be collected by gently touching it with the receiving vessel (Erlenmeyer). A drop has a volume of approximately 0.05 ml and can represent a significant error when measuring small volumes.
References
- Isac-García, J.; Dobado, J. A.; Calvo-Flores, F. G.; and Martínez-García, H. (2015). Experimental Organic Chemistry Laboratory Manual. Elsevier Science & Technology. ISBN: 978-0-12-803893-2